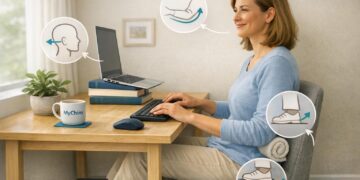

Anterior pelvic tilt, often described as a forward tipping of the pelvis, is a common postural pattern that can result from muscle imbalances. This is typically due to tight hip flexors combined with underactive gluteal and abdominal muscles. This posture can be influenced by prolonged sitting and certain lifestyle habits, contributing to an exaggerated curve in the lower back.
While it's a natural spinal curve, an excessive tilt can affect how your body moves and distributes load, potentially impacting everything from your lower back to your neck. A holistic approach often involves understanding how underlying foot conditions, such as how fallen arches can impact posture, can influence overall body alignment.
The good news is that targeted movements and stretches can help improve this imbalance. Committing to a consistent routine can be a proactive step towards better movement and spinal health. This article provides a detailed guide to six foundational anterior pelvic tilt exercises, designed to help you build awareness and encourage better pelvic alignment. We'll explore each movement in detail, explaining not just how to perform it, but why it's beneficial for developing a more balanced posture.
1. Hip Flexor Stretch (Couch Stretch)
If you spend a lot of time sitting, whether at a desk in Bondi Junction or during a long commute, your hip flexors can become chronically tight. These muscles, including the psoas and rectus femoris, connect your thigh bone to your pelvis and lower back. When they shorten, they pull the front of your pelvis down, creating the forward tilt that defines anterior pelvic tilt. The Couch Stretch is a powerful exercise designed to directly target and lengthen these exact muscles, making it a cornerstone of many corrective exercise programs.
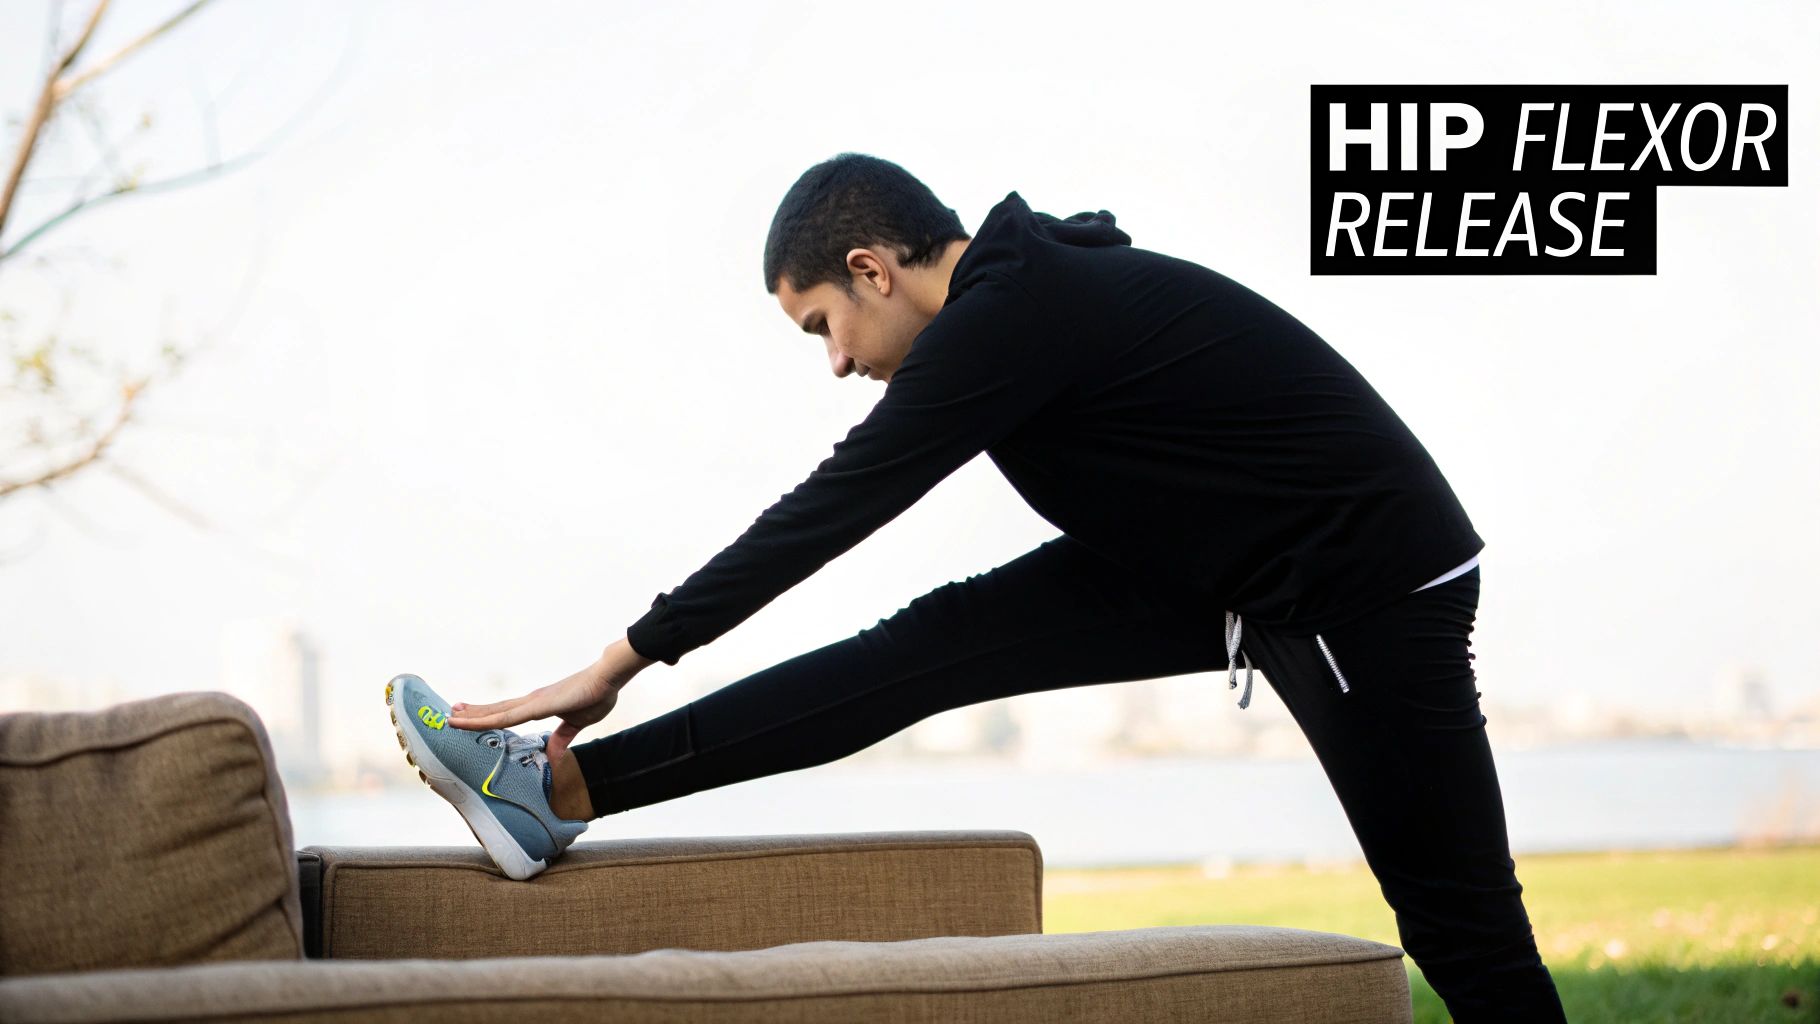
Popularised by figures like mobility authority Dr. Kelly Starrett, this stretch is a favourite in physical therapy settings and high-performance athletic routines for its effectiveness. It directly counteracts the effects of prolonged sitting and helps re-establish a more neutral pelvic position.
How to Perform the Couch Stretch
Follow these steps to safely and effectively perform one of the best anterior pelvic tilt exercises you can do.
- Get into Position: Place a pad or mat on the floor next to a wall, couch, or sturdy box. Kneel on the pad and place the top of your back foot against the wall, with your shin vertical.
- Bring the Front Leg Up: Step your other foot forward, planting it flat on the floor in a lunge position. Your front shin should be vertical, with your knee directly over your ankle.
- Engage and Straighten: Squeeze your glute (buttock muscle) on the rear leg side. This action helps to posteriorly tilt your pelvis, intensifying the stretch. Slowly raise your torso until it's upright.
- Hold the Stretch: You should feel a deep stretch in the front of your hip and thigh on the back leg. Hold this position without arching your lower back.
Key Insight: The goal isn't to lean back as far as possible. The most important part of this stretch is squeezing the glute of the rear leg to tilt the pelvis backward. This isolates the stretch in the hip flexor, where it's needed most.
Common Mistakes to Avoid
- Arching Your Back: This is a common compensation that reduces the stretch on the hip flexor. Keep your core engaged (imagine pulling your belly button towards your spine) to maintain a neutral spine.
- Front Knee Drifting Forward: Ensure your front knee stays aligned over your ankle. Allowing it to travel past your toes can place unnecessary strain on the knee joint.
- Not Using a Pad: The pressure on your kneecap can be intense. Always use a folded towel, yoga mat, or foam pad for cushioning.
To see a detailed demonstration of the proper form for this key stretch, check out the video below.
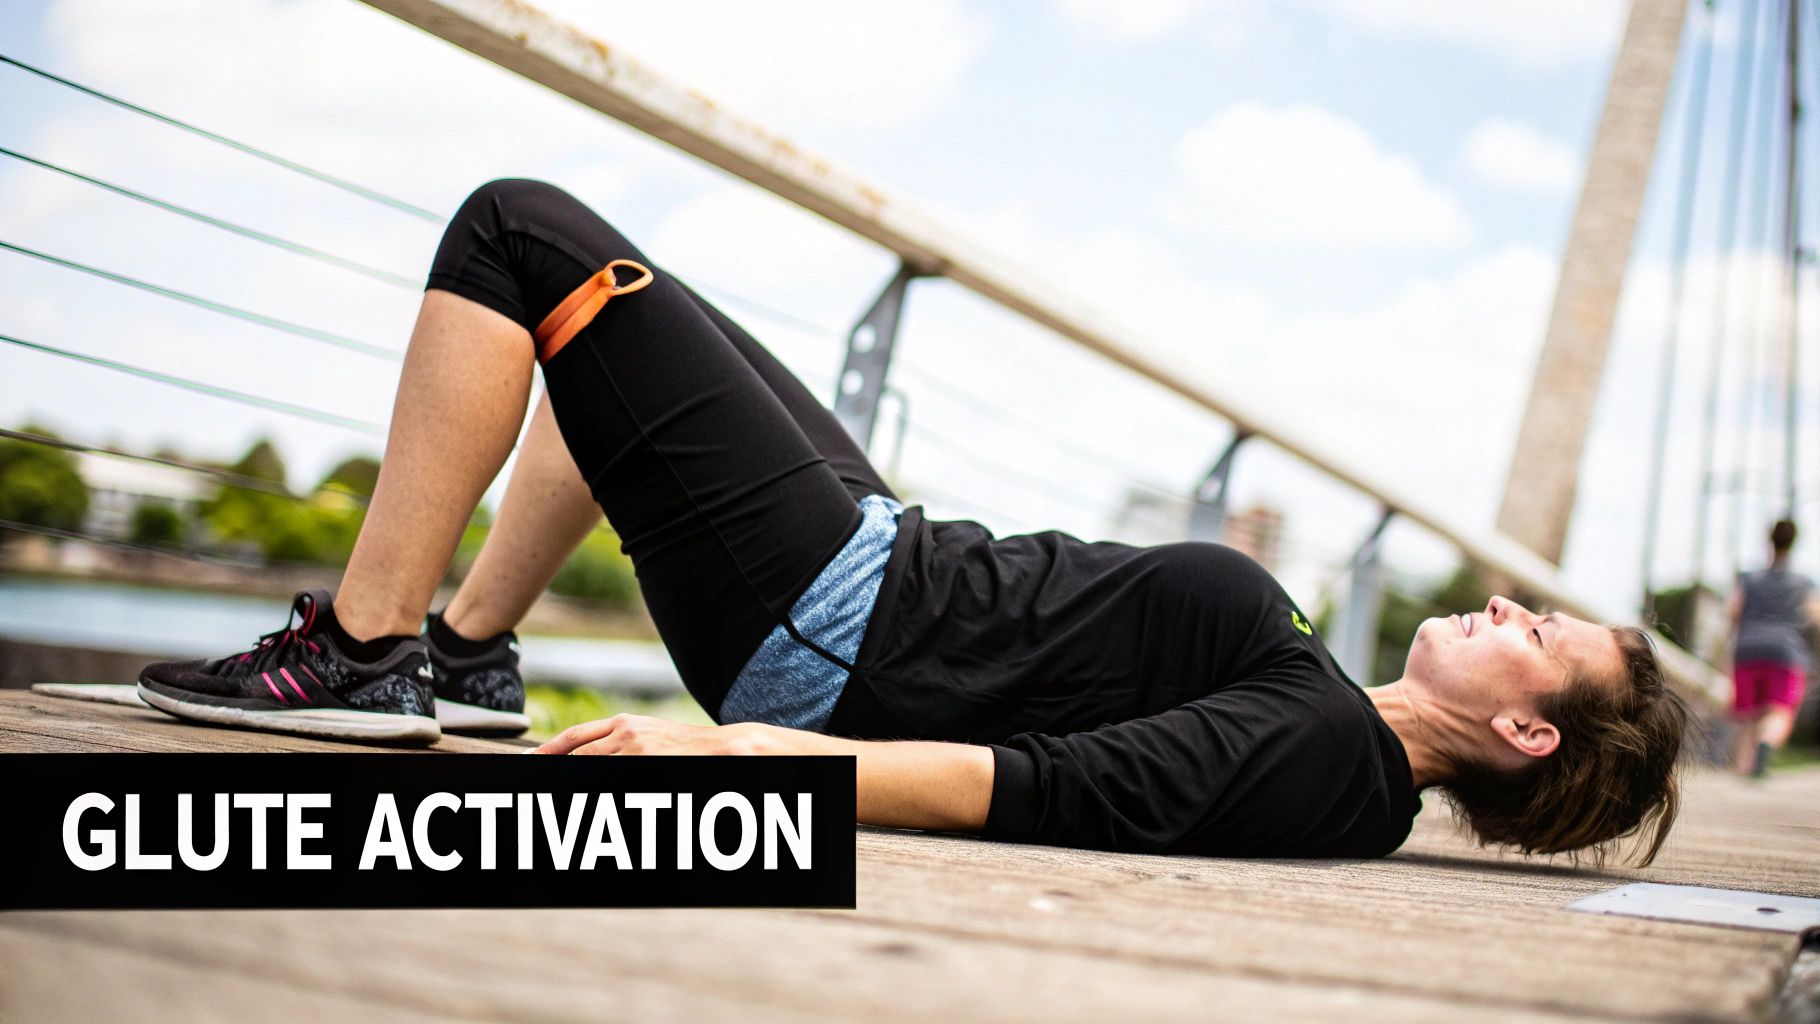
2. Glute Bridges
Anterior pelvic tilt is often caused by a combination of tight hip flexors and weak gluteal muscles. While stretching the front is crucial, strengthening the back is equally important. The Glute Bridge is a foundational exercise that directly targets your gluteus maximus, the primary muscle responsible for hip extension. Activating and strengthening this muscle helps pull the pelvis back into a more neutral alignment, directly counteracting the forward tilt.
This movement is a staple in physical therapy and strength training, championed by figures like strength coach Bret Contreras and corrective exercise professional Eric Cressey. Its simplicity and effectiveness make it a go-to exercise in post-pregnancy rehabilitation and programs designed to address lower back discomfort, as it teaches the body to use the glutes for hip extension instead of over-relying on the lower back muscles.
How to Perform the Glute Bridge
Follow these steps to correctly perform one of the most effective anterior pelvic tilt exercises for building foundational strength.
- Starting Position: Lie on your back on a mat with your knees bent and your feet flat on the floor, about hip-width apart. Your feet should be close enough that you can just touch your heels with your fingertips. Rest your arms by your sides with your palms down.
- Engage the Core: Gently brace your abdominal muscles, as if preparing for a light punch to the stomach. This helps keep your spine stable throughout the movement.
- Lift the Hips: Press through your heels and squeeze your glutes to lift your hips off the floor. Raise them until your body forms a straight line from your shoulders to your knees. Avoid arching your lower back at the top.
- Squeeze and Hold: At the peak of the movement, consciously squeeze your glutes for a moment before slowly lowering your hips back to the starting position with control.
Key Insight: The main driver of this movement should be your glutes, not your hamstrings or lower back. If you feel it more in your hamstrings, try moving your feet slightly closer to your body. If you feel it in your back, focus on bracing your core and not lifting your hips too high.
Common Mistakes to Avoid
- Hyperextending the Back: A very common error is pushing the hips up too high, which causes the lower back to arch. This shifts the load from the glutes to the lumbar spine. Only lift until your body is in a straight line.
- Driving with the Toes: Pushing through your toes instead of your heels can lead to less glute activation and more hamstring involvement. Keep your feet flat and focus the pressure through your heels.
- Knees Caving Inward: Allowing your knees to fall in towards each other can place stress on the knee joints and indicates weaker hip abductor muscles. Keep your knees aligned with your hips and ankles throughout the exercise.
To see a detailed demonstration of the proper form for the Glute Bridge, check out the video below.
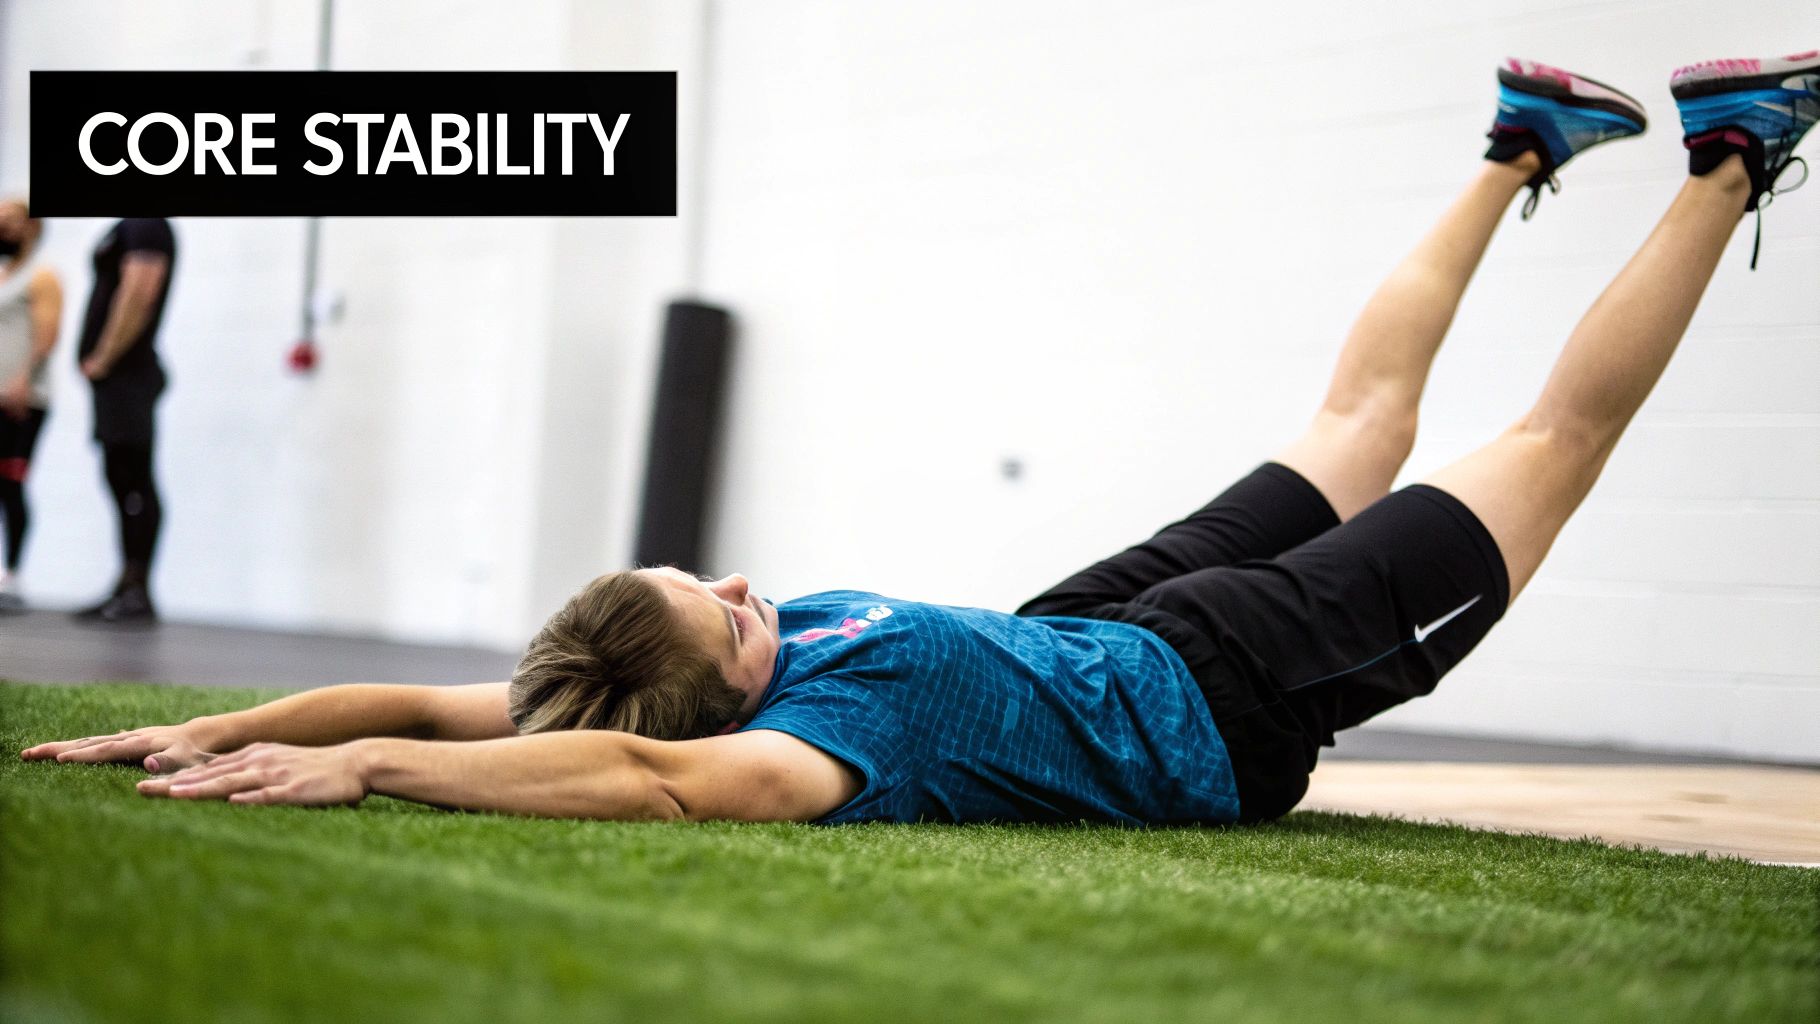
3. Dead Bug Exercise
Anterior pelvic tilt is often caused by a muscular imbalance where the core muscles are weak and the hip flexors are tight. The Dead Bug exercise directly addresses the weakness in your deep core muscles, such as the transverse abdominis. It teaches your body to maintain a stable, neutral pelvis while your limbs are in motion, which is crucial for reversing the forward tilt and improving your posture. This makes it one of the most effective foundational anterior pelvic tilt exercises.
Promoted by figures in functional movement and rehabilitation like Diane Lee and Brett Winchester, the Dead Bug is a staple in physical therapy programs and high-level athletic training. It’s prized for its ability to build core stability without putting strain on the lower back, making it a safe starting point for many individuals looking to improve their spinal alignment.
How to Perform the Dead Bug Exercise
Follow these steps to correctly perform this core-strengthening exercise.
- Get into Position: Lie on your back on a mat with your knees bent and feet flat on the floor. Raise your legs so your shins are parallel to the floor, creating a 90-degree angle at your hips and knees (the "tabletop" position).
- Extend Your Arms: Reach your arms straight up towards the ceiling, directly over your shoulders.
- Engage and Extend: Take a breath in. As you exhale, slowly lower your right arm and left leg towards the floor simultaneously. Go only as far as you can without your lower back arching off the floor.
- Return and Repeat: In a controlled manner, bring your arm and leg back to the starting position. Repeat the movement on the opposite side (left arm and right leg). This completes one repetition.
Key Insight: The primary goal is to keep your lower back in contact with the floor throughout the entire movement. This ensures your deep core muscles are doing the work, not your back. If your back starts to arch, you've lowered your limbs too far.
Common Mistakes to Avoid
- Arching the Lower Back: This is the most common error and it defeats the purpose of the exercise. Press your lower back gently into the floor and keep your core braced.
- Moving Too Quickly: Performing the movement with speed or momentum uses other muscles and reduces the engagement of your deep core. Focus on slow, deliberate control.
- Holding Your Breath: Breathe steadily throughout the exercise. A good pattern is to exhale as you lower your limbs and inhale as you return to the start.
This exercise is a fundamental part of many corrective routines. For more information on how such movements fit into a broader wellness plan, you can explore why to include chiropractic exercises in your daily routine.
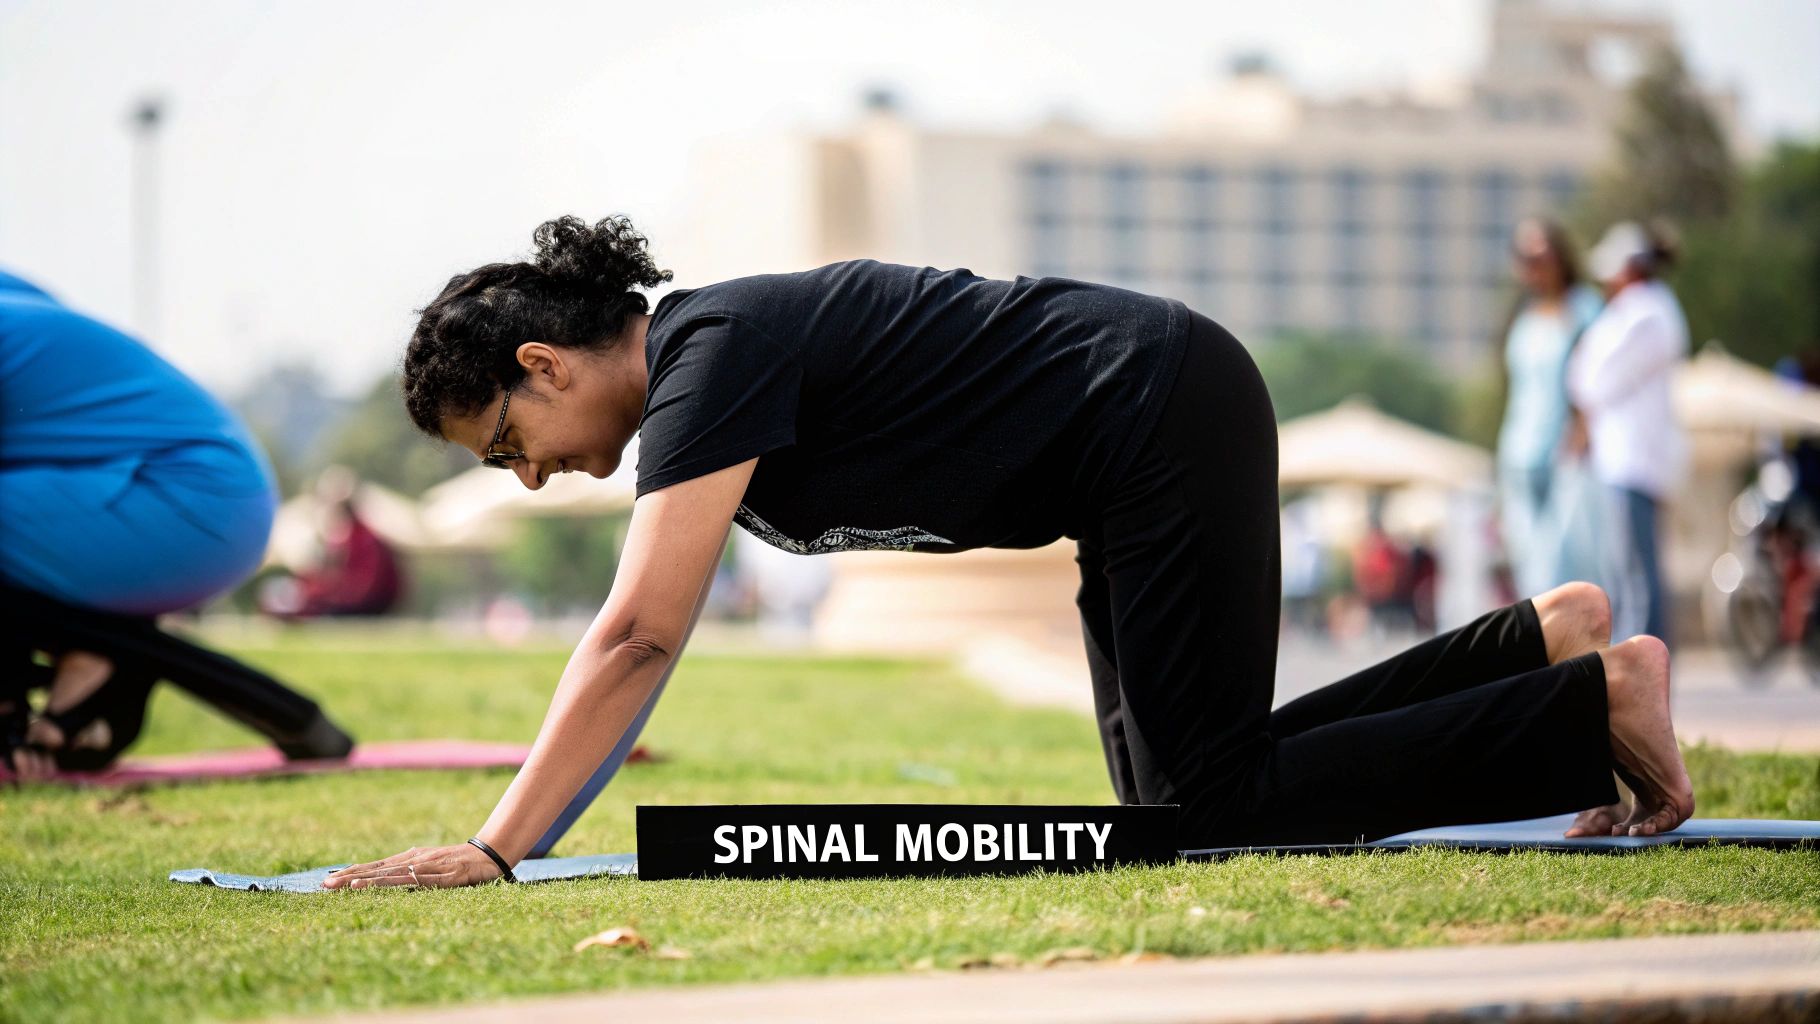
4. Cat-Cow Stretch
Anterior pelvic tilt is not just about tight or weak muscles; it's also about a lack of awareness of your pelvic position. The Cat-Cow Stretch is a foundational dynamic movement that directly addresses this by teaching you how to consciously move your pelvis between a forward tilt (Cow) and a backward tilt (Cat). This gentle, flowing exercise helps improve spinal mobility, reduces stiffness in the lower back, and enhances the mind-body connection needed to maintain a neutral spine throughout your day.
Originating from traditional yoga practices and widely adopted in physical therapy and mobility routines, Cat-Cow is celebrated for its simplicity and effectiveness. It’s an ideal exercise for anyone, from office workers in the Eastern Suburbs looking to counteract the effects of sitting to athletes warming up their spine. By practising this movement, you build the motor control necessary to correct your posture.
How to Perform the Cat-Cow Stretch
Follow these steps to perform one of the most effective anterior pelvic tilt exercises for building pelvic awareness.
- Get into Position: Start on your hands and knees in a "tabletop" position. Your hands should be directly under your shoulders and your knees directly under your hips.
- Move into Cow Pose: Inhale as you drop your belly towards the mat. Lift your chin and chest, and look up towards the ceiling. This action creates an arch in your back and tilts your pelvis forward, similar to the APT posture you're trying to correct.
- Move into Cat Pose: Exhale as you press into your hands and round your spine upward. Tuck your chin into your chest and draw your navel towards your spine. This action posteriorly tilts your pelvis, actively countering the forward tilt.
- Flow Between Poses: Continue flowing slowly and deliberately between Cow on the inhale and Cat on the exhale for 10-15 repetitions.
Key Insight: The primary goal is not to push to the absolute end range of motion. Instead, focus on initiating the movement from your pelvis. Feel your tailbone tucking under for Cat and lifting for Cow, letting the rest of your spine follow the movement like a wave.
Common Mistakes to Avoid
- Moving Too Quickly: Rushing through the movement turns it into a generic rocking motion and removes the benefit of neuromuscular control. Move slowly and connect the movement to your breath.
- Shifting Your Hips: Avoid rocking your hips backward or forward. Your knees and hands should remain stationary, isolating the movement to your spine and pelvis.
- Bending the Elbows: Keep your arms straight but not locked. Bending your elbows changes the dynamic of the exercise and reduces the focus on spinal articulation.
You can learn more about the health benefits of the Cat-Cow exercise to understand its full potential for improving spinal health.
5. Posterior Pelvic Tilt
The posterior pelvic tilt is less of a traditional exercise and more of a foundational movement pattern. It is the direct neuromuscular antidote to anterior pelvic tilt. By consciously learning to tilt your pelvis backward, you are re-educating the muscles responsible for maintaining a neutral spine, specifically your lower abdominals and glutes. This fundamental action forms the basis of almost all corrective exercises aimed at improving posture and spinal alignment.
This movement is heavily emphasised in postural restoration programs and by figures like physical therapist Stuart McGill because it builds core stability from the ground up. It teaches you how to actively engage the muscles that counteract the forward pull on your pelvis, making it one of the most essential anterior pelvic tilt exercises for long-term correction. Mastering this allows you to maintain better posture throughout the day, whether you're standing, sitting at your desk, or lifting weights.
How to Perform the Posterior Pelvic Tilt
Follow these steps to master the basic movement that underpins good pelvic alignment. The supine (lying down) version is the easiest way to learn.
- Get into Position: Lie on your back on a firm surface, like a yoga mat. Bend your knees and place your feet flat on the floor, about hip-width apart. Your arms can rest by your sides.
- Flatten Your Back: Gently engage your abdominal muscles to press your lower back flat against the floor. There should be no arch or space between your back and the mat.
- Tilt the Pelvis: As you flatten your back, imagine you are "tucking your tailbone under" or pulling your pubic bone up towards your belly button. Your hips should slightly lift off the floor.
- Hold and Release: Hold this tilted position for 5-10 seconds, focusing on the contraction in your lower abs and glutes. Slowly release back to the starting position and repeat.
Key Insight: The movement should be small and controlled. The goal is not to lift your hips high as in a glute bridge, but to isolate the rotational movement of the pelvis using your core muscles. Focus on the feeling of your lower back making contact with the floor.
Common Mistakes to Avoid
- Using Your Legs to Push: Avoid pushing forcefully with your feet. The work should come from your abdominal and gluteal muscles, not your legs or hamstrings.
- Holding Your Breath: It's common to hold your breath when concentrating. Remember to breathe smoothly and consistently throughout the movement to keep your muscles relaxed.
- Arching the Back on Release: When you return to the starting position, do so with control. Don't simply let go and allow your lower back to arch excessively.
Once mastered while lying down, you can practice this movement while sitting or standing to improve your daily posture. You can learn more about how chiropractic exercises can improve your posture and support a healthy spine.
6. Wall Sits with Posterior Pelvic Tilt
The standard Wall Sit is a classic isometric exercise for building quad strength, but with a small tweak, it transforms into one of the most effective anterior pelvic tilt exercises available. By focusing on maintaining a posterior pelvic tilt throughout the hold, you do more than just burn your thighs; you actively retrain your core and glutes to hold your pelvis in a more neutral alignment. This exercise strengthens the exact muscles needed to counteract the forward pull of tight hip flexors and weak abdominals.
This modified wall sit is a staple in athletic training programs and rehabilitation protocols for lower back issues. Strength coaches like Dan John and physical therapists have long advocated for this type of isometric hold to build functional core stability and reinforce correct postural patterns that carry over into daily life. It’s a simple, low-impact way to build endurance in the muscles that support a healthy pelvic position.
How to Perform the Wall Sit with Posterior Pelvic Tilt
Follow these steps to correctly perform this powerful stability exercise.
- Set Up: Stand with your back against a smooth wall, feet about hip-width apart and roughly two feet away from the wall.
- Slide Down: Slowly slide your back down the wall until your thighs are parallel to the floor, as if you're sitting in an invisible chair. Your knees should be directly above your ankles, forming a 90-degree angle.
- Engage and Tilt: This is the most crucial step. Actively press your entire lower back flat against the wall. To do this, engage your abdominal muscles (imagine pulling your belly button towards your spine) and gently squeeze your glutes. This action will create a posterior (backward) tilt of your pelvis, eliminating the arch in your lower back.
- Hold and Breathe: Maintain this flat-back position and hold the sit. Breathe steadily throughout the hold.
Key Insight: The main objective isn't just to hold the seated position, but to actively maintain the connection between your lower back and the wall. If you feel an arch returning, reset by re-engaging your core and glutes to press your back flat again.
Common Mistakes to Avoid
- Arching the Lower Back: This is the most common error and it defeats the purpose of the exercise for correcting anterior pelvic tilt. Focus intensely on keeping your lower back pressed firmly into the wall.
- Letting Knees Cave Inward: Keep your knees aligned with your hips and ankles. Allowing them to drift inward can place stress on the knee joints.
- Sliding Too Low or Not Low Enough: Aim for your thighs to be parallel to the floor. Going too low puts excessive pressure on the knees, while not going low enough reduces the engagement of your quads and glutes.
- Holding Your Breath: Remember to breathe continuously. Holding your breath can increase blood pressure and prevent your muscles from getting the oxygen they need.
For a clear visual guide on achieving the correct pelvic tilt during this exercise, review the instructional video below.
6-Exercise Comparison for Anterior Pelvic Tilt
| Exercise | Implementation Complexity 🔄 | Resource Requirements ⚡ | Expected Outcomes 📊 | Ideal Use Cases 💡 | Key Advantages ⭐ |
|---|---|---|---|---|---|
| Hip Flexor Stretch (Couch Stretch) | Moderate – requires balance and coordination | Minimal – bodyweight & elevated surface | Improved hip flexor flexibility and mobility | Mobility routines, rehab for hip impingement | Highly effective for tight hip flexors; portable |
| Glute Bridges | Low – simple supine movement | None – bodyweight | Strengthened glutes and hip extensors | Beginners, rehab, warm-up for runners | Safe, strengthens posterior chain; scalable |
| Dead Bug Exercise | Moderate – needs coordination | None – bodyweight | Enhanced core stability and motor control | Core rehab, Pilates/yoga, athletic training | Excellent core control; low spine impact |
| Cat-Cow Stretch | Low – gentle, dynamic movement | None | Increased spinal mobility and pelvic awareness | Warm-up/cool-down, yoga, general mobility | Gentle, improves spinal flexibility, body awareness |
| Posterior Pelvic Tilt | Low – simple movement pattern | None | Improved pelvic alignment and posture | Postural retraining, ergonomic training | Direct focus on pelvic tilt; no equipment needed |
| Wall Sits with Posterior Pelvic Tilt | Moderate – isometric, form-focused | Minimal – wall needed | Strengthened glutes/core and posture endurance | Athletic training, rehab, workplace wellness | Combines strengthening with postural correction |
Integrating These Exercises into Your Routine for Better Posture
You now have a foundational toolkit of six targeted anterior pelvic tilt exercises designed to restore balance to your pelvis and improve your posture. The journey to a more neutral pelvic position isn’t about a single workout; it’s about consistently integrating these movements into your life. The exercises we’ve explored, from the deep Hip Flexor Stretch to the core-engaging Dead Bug, work together to address the root causes of an anterior tilt: tight hip flexors and weak, underactive glutes and abdominals.
Mastering these movements provides more than just a physical adjustment. It fosters a profound sense of body awareness. You'll start to notice your posture not just during exercise, but while standing in a queue, sitting at your desk in the office, or lifting groceries. This heightened awareness is the true catalyst for lasting change, empowering you to make small, corrective adjustments throughout your day.
Your Action Plan for Success
To make these exercises a sustainable habit, consider the following strategy:
- Start Small: Begin by selecting just two or three exercises that feel most beneficial. You could choose one stretch (like the Cat-Cow) and one strengthening movement (like Glute Bridges).
- Focus on Form: Prioritise quality over quantity. Ten perfectly executed Glute Bridges with a proper posterior tilt are far more effective than 30 rushed repetitions. Use a mirror or record yourself to check your form against the guidelines provided.
- Create a Routine: Dedicate 10-15 minutes, three to five times per week, to your chosen exercises. You could do them first thing in the morning to activate your muscles for the day, or as a wind-down routine in the evening to release tension.
- Listen to Your Body: It's normal to feel your muscles working, but you should not feel sharp or pinching sensations. If a movement causes discomfort, reduce the range of motion or return to a more basic version.
Key Takeaway: Consistency is more important than intensity. A little bit of focused effort, performed regularly, will yield far greater results than sporadic, intense workouts. Building new movement patterns takes time and patience.
Because an anterior pelvic tilt is so often linked with lower back discomfort, expanding your knowledge of supportive exercises can be highly beneficial. Pre ďalšie zamerané cvičenia, ktoré môžu pomôcť zmierniť a predchádzať bolesti v dolnej časti chrbta, ktorá často súvisí s panvovým sklonom, objavte tieto cviky na bolesti krížov.
By embracing these anterior pelvic tilt exercises, you are taking a proactive step towards better movement, improved posture, and greater overall comfort. The power to create positive change lies in consistent, mindful practice.
If you're in Bondi Junction or the Eastern Suburbs and feel you could benefit from a personalised assessment of your posture and movement patterns, the team at MyChiro is here to help. We can provide guidance to help you reach your health and wellness objectives. Book your consultation at MyChiro to start your journey towards better spinal health today.
Article created using Outrank