
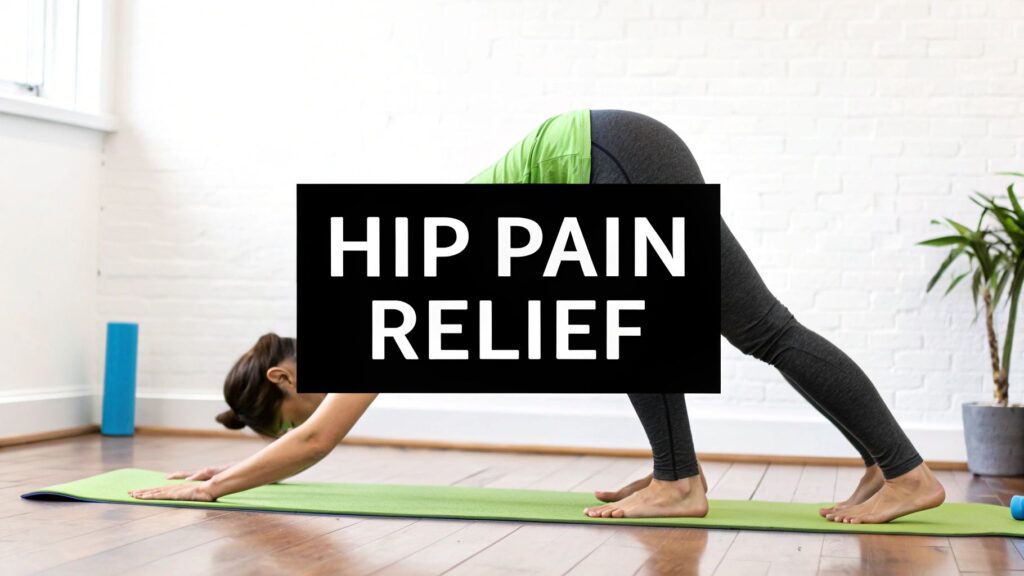
Hip pain can stem from various sources, including muscle tightness, joint stiffness, and postural imbalances often related to prolonged sitting or specific physical activities. Understanding various sources of discomfort, such as tight muscles and restricted mobility, is an important first step. For instance, learning how to get rid of stubborn muscle knots can complement a stretching routine by addressing localised tension. Improving the mobility and flexibility of the muscles surrounding the hip joint is a common strategy for managing this discomfort.
This article provides a guide to seven specific stretches for hip pain designed to target these key areas. For each movement, we will outline:
- Step-by-step instructions for correct form.
- The primary muscles being targeted.
- Important considerations for safe practice.
The goal is to offer a structured approach to mobility work that you can consider incorporating into your routine. It is important to remember that while stretching can be beneficial for many, it may not be suitable for all conditions, and individual results can vary. Stretching has potential benefits but also risks, such as muscle strain if performed incorrectly. If your pain is severe or persists, consulting a qualified healthcare professional for a thorough assessment and personalised advice is recommended.
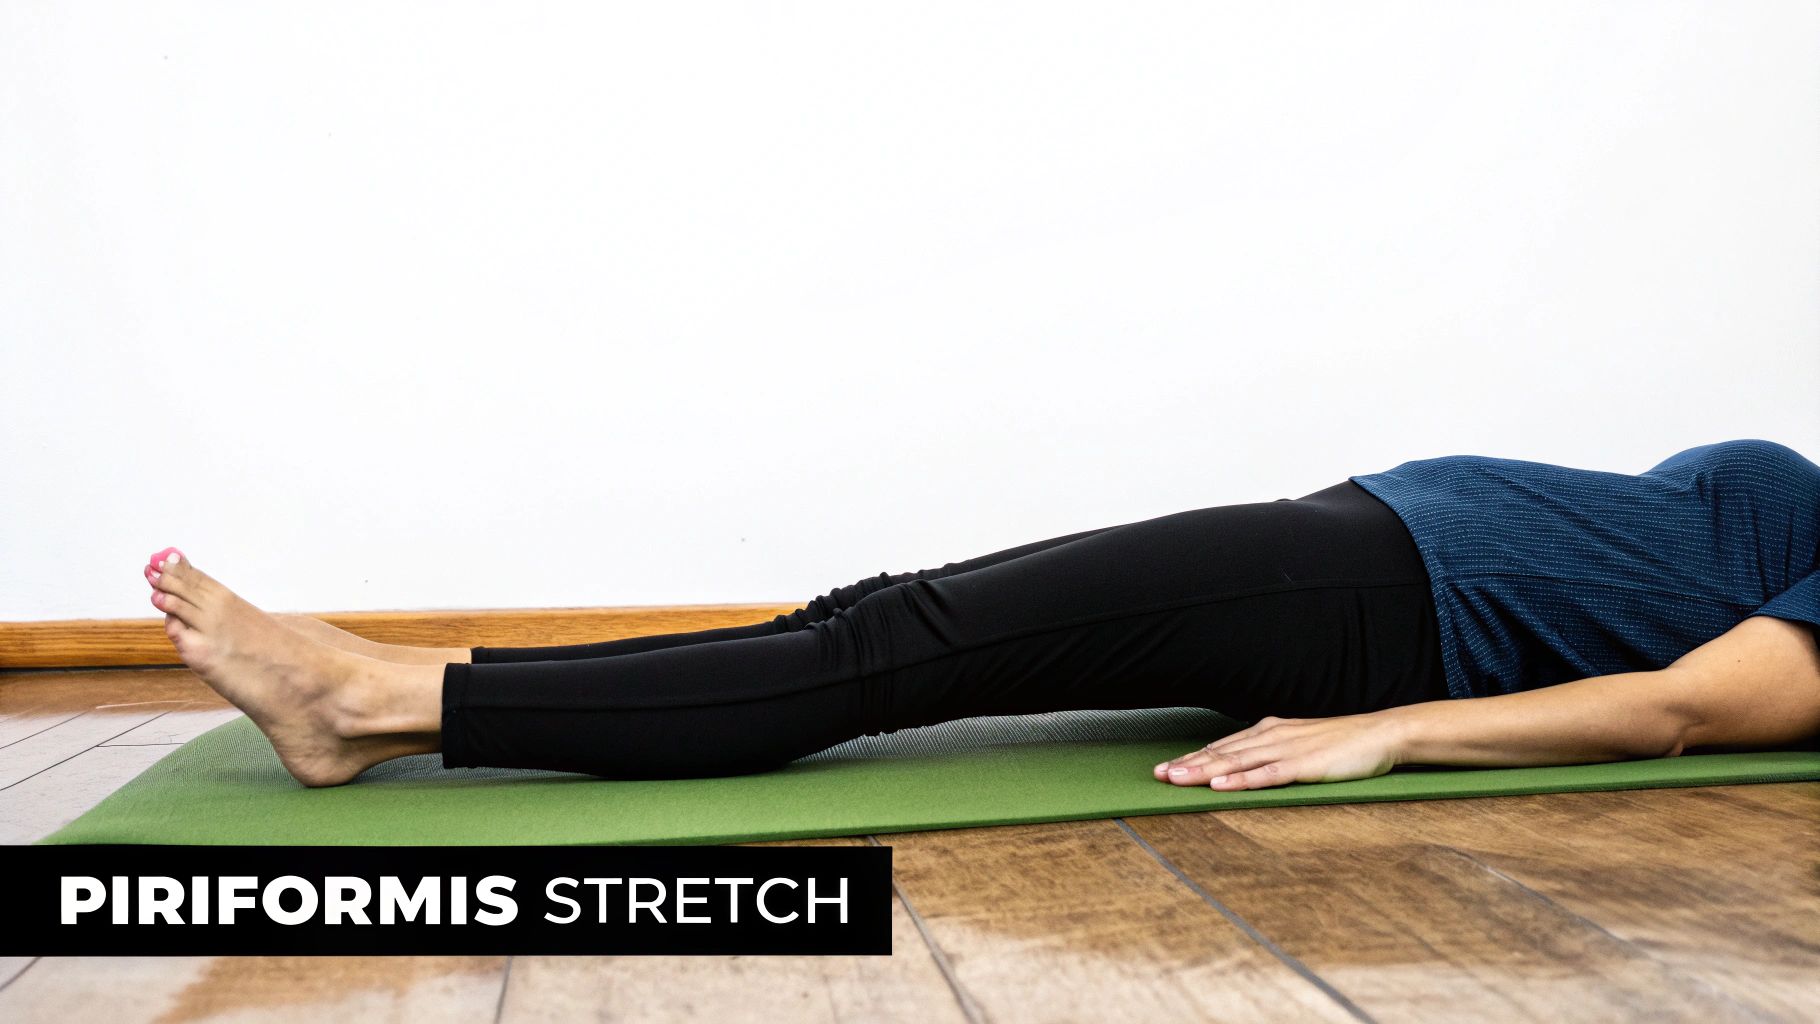
1. Pigeon Pose (Eka Pada Rajakapotasana)
Pigeon Pose is a foundational yoga stretch often used for its ability to target deep hip muscles. It primarily focuses on stretching the hip flexors and rotators, particularly the piriformis, a small muscle located deep in the buttocks that can contribute to hip discomfort when tight. This pose isolates and gently opens the hip joint, which may promote greater flexibility and circulation in the area.
Popularised in modern yoga by figures like B.K.S. Iyengar and Adriene Mishler of the Yoga with Adriene YouTube channel, Pigeon Pose is a common exercise in some physical therapy programs and athletic maintenance routines. Runners and cyclists, for example, often incorporate it to counteract the repetitive forward motion that can shorten and tighten hip flexors.
How to Perform the Pigeon Pose
- Start on all fours in a tabletop position.
- Bring your right knee forward and place it behind your right wrist. Angle your right shin so your right foot is somewhere in front of your left hip.
- Slide your left leg straight back, keeping the top of your foot on the floor.
- Ensure your hips are square and facing forward. Avoid leaning onto your right hip; aim to keep your weight evenly distributed.
- If you feel stable, you can gently walk your hands forward and lower your torso over your front leg to deepen the stretch.
Important Consideration: Proper alignment is crucial to avoid placing undue stress on the knee. If you feel any sharp pain, especially in the knee of the bent leg, ease out of the pose. Performing this stretch incorrectly could lead to joint strain.
Tips for a Better Stretch
- Use Support: Place a folded blanket, yoga block, or pillow under the hip of your bent leg. This support helps keep your hips level and makes the pose more accessible if you have limited flexibility.
- Breathe Deeply: Focus on long, slow exhalations to help your muscles relax into the stretch. Hold for 30-60 seconds before carefully switching sides.
- Keep Hips Level: Actively press the hip of your extended back leg towards the floor to maintain square alignment.
This pose should create a stretching sensation in the outer hip and glute of the front leg and the front of the hip (hip flexor) of the back leg.
2. 90/90 Hip Stretch
The 90/90 Hip Stretch is a seated stretch designed to improve hip mobility by addressing both internal and external rotation simultaneously. It positions both legs at 90-degree angles, creating a unique setup that isolates each hip joint. This makes it a useful stretch as it directly targets and helps improve rotational capacity, which is often limited in individuals experiencing hip discomfort.
Popularised by figures like mobility coach Kelly Starrett and physical therapist Gray Cook, the 90/90 stretch is included in many athletic and rehabilitation programs. It's frequently used in CrossFit mobility routines and by professional athletes to maintain hip health and function. Its inclusion in movement assessments like the Functional Movement Screen highlights its use in identifying and correcting hip imbalances.
How to Perform the 90/90 Hip Stretch
- Sit on the floor. Position your front leg so your shin is directly in front of you, with your knee and ankle both bent at 90-degree angles.
- Position your back leg to the side, also ensuring the knee and ankle are bent at 90-degree angles. The shin of your back leg should be parallel to the front of your mat or space.
- Sit up tall, lengthening your spine. Both of your sitting bones should ideally be on the floor.
- Gently lean your torso forward over your front shin to increase the stretch in your front hip's external rotators.
- After holding, rotate your torso towards your back leg to feel a stretch in the internal rotators of the back hip.
Important Consideration: This stretch can feel intense. If you experience sharp pain in your knees or hips, reduce the range of motion. The goal is to feel a deep stretch, not pain. Incorrect form could risk straining the knee or hip joints.
Tips for a Better Stretch
- Sit Tall: Focus on maintaining a straight, upright spine throughout the movement. Avoid rounding your back, as this can take the focus away from the hips.
- Use Your Hands for Support: Place your hands on the floor beside you for balance and to help you control the intensity of the stretch.
- Breathe into the Stretch: Use your breath to help your muscles relax. Hold the stretch for 45-60 seconds on each side, breathing deeply and consistently.
- Switch Sides: Carefully switch the position of your legs and repeat the stretch on the other side to ensure balanced mobility work.
This position should create a stretching sensation in the outer hip and glute of the front leg (external rotation) and the inner hip and groin area of the back leg (internal rotation).
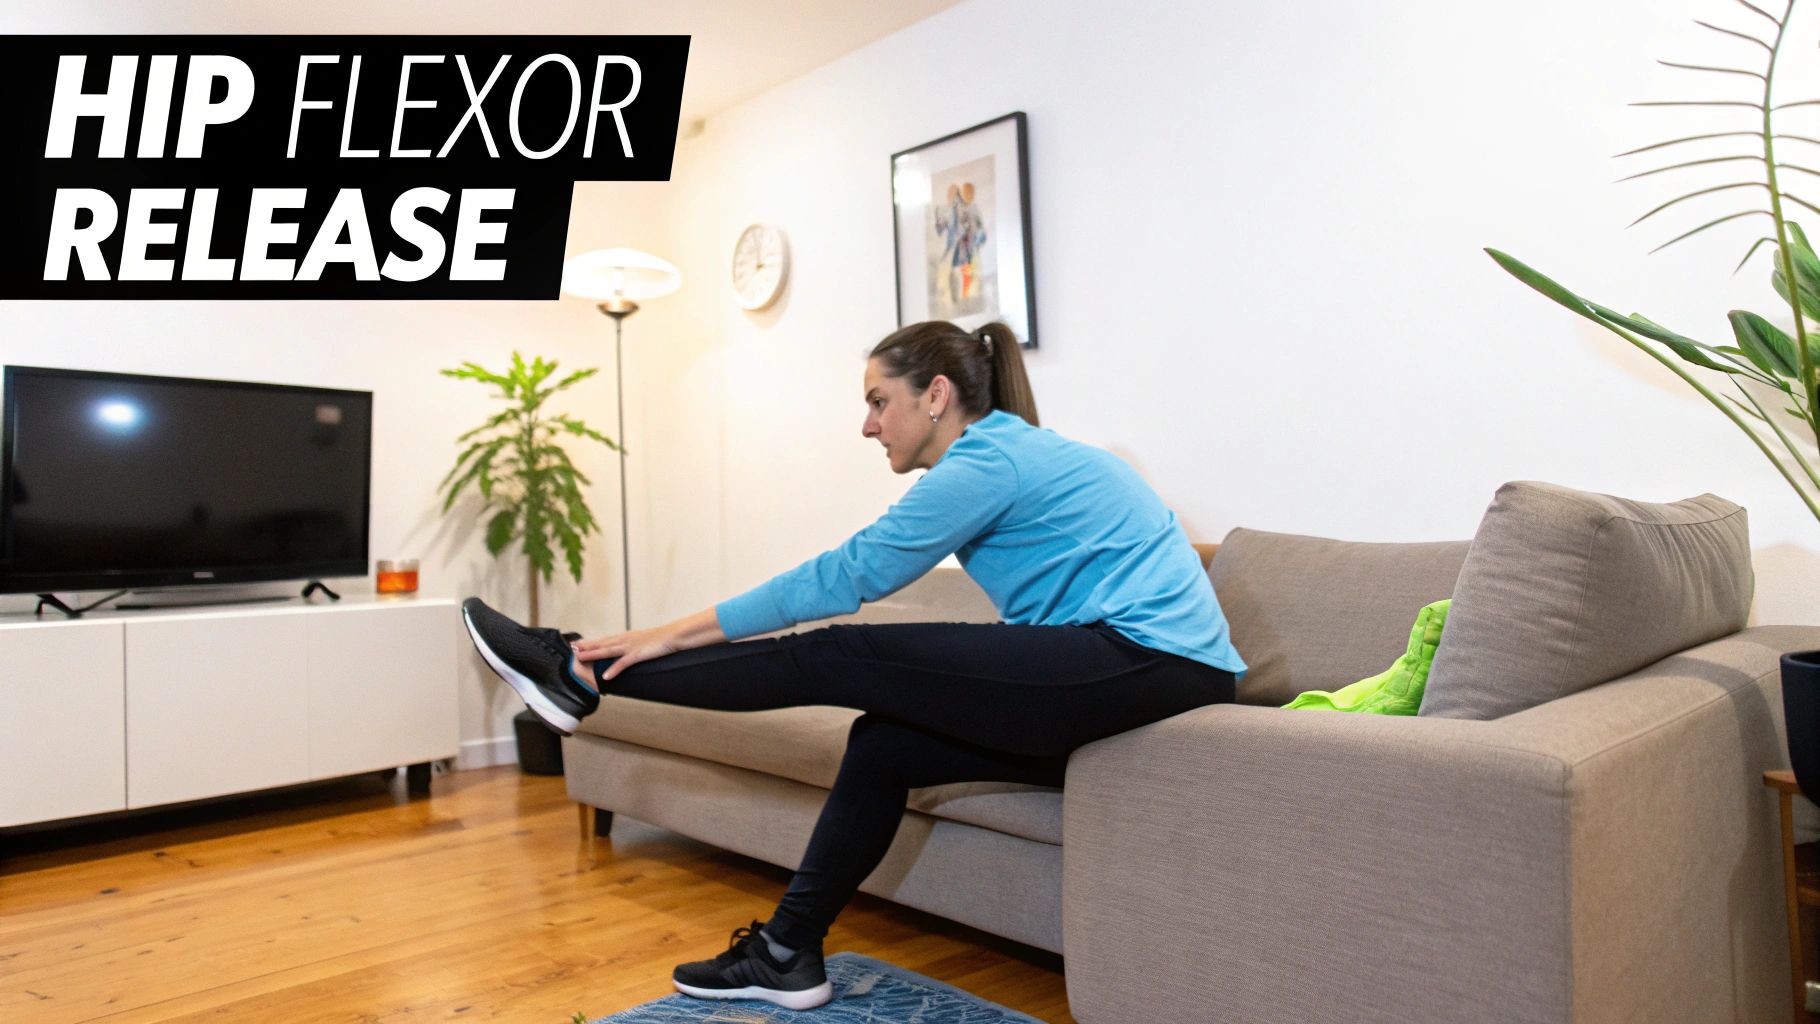
3. Hip Flexor Stretch (Couch Stretch)
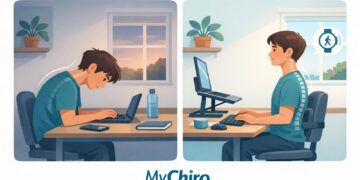
The Hip Flexor Stretch, often called the "Couch Stretch," is an intense stretch designed to target the muscles at the front of your hip. It is particularly useful for lengthening the hip flexors, including the psoas and rectus femoris, which often become tight from prolonged sitting. This makes it a beneficial stretch for hip pain, as it directly counteracts the postural stress many people experience daily, helping to improve mobility in the hip region.
Popularised in the mobility and fitness communities by figures like physical therapist Kelly Starrett, the Couch Stretch is a staple for CrossFit athletes, office workers, and anyone looking to address hip tightness. It's frequently incorporated into athletic performance programs and rehabilitation protocols to address hip flexor tightness and postural imbalances. The intensity of the stretch is what makes it useful for creating change in tissue length.
How to Perform the Hip Flexor Stretch (Couch Stretch)
- Find a stable surface like a couch, bench, or wall. Place a pad or mat on the floor for your knee.
- Position yourself in a lunge with your back to the couch. Place the top of your left foot onto the couch with your shin resting against the vertical surface.
- Bring your right foot forward, placing it flat on the floor with your right knee bent at a 90-degree angle.
- Keeping your torso upright, gently squeeze your glutes and engage your core. You should feel a deep stretch along the front of your left thigh and hip.
- Hold the position, breathing deeply, before carefully switching to the other side.
Important Consideration: This is an intense stretch. If you feel sharp pain in your knee or lower back, ease off immediately. The goal is a strong stretching sensation, not pain. Due to its intensity, there is a risk of overstretching or straining the quadriceps or hip flexor if not performed with control.
Tips for a Better Stretch
- Support Your Knee: Always place a folded towel or cushion under your back knee to reduce pressure and improve comfort.
- Maintain an Upright Posture: Actively work to keep your torso vertical and avoid arching your lower back. This isolates the stretch in the hip flexor. For more on posture, see these anterior pelvic tilt exercises.
- Start Gradually: If the stretch feels too intense, begin with shorter holds of 15-30 seconds and slowly work your way up to longer durations as your flexibility improves.
This stretch provides a significant lengthening sensation in the front of the hip and thigh of the back leg. Proper form is essential for effectiveness and to avoid placing unintended stress on the lower back.
4. Figure-4 Hip Stretch
The Figure-4 Stretch is a highly adaptable and useful movement for addressing hip discomfort. It gets its name from the ‘4’ shape created by placing one ankle across the opposite knee. This position specifically targets the piriformis, glutes, and external hip rotators, all of which can become tight and contribute to hip and lower back pain. Its versatility is a key reason it is a frequently recommended stretch for hip-related tightness, as it can be performed lying down, seated, or even standing.
This stretch is a staple in many physical therapy programs and is widely used by fitness trainers and healthcare providers for managing lower back and hip-related issues. Runners often use it as part of their routine to address piriformis tightness, while corporate wellness programs feature it as an accessible stretch for office workers to perform at their desks. Its gentle nature also makes it suitable for senior fitness routines.
How to Perform the Figure-4 Stretch (Lying Down)
- Lie on your back with both knees bent and your feet flat on the floor.
- Lift your right foot and cross your right ankle over your left thigh, just above the knee. Keep your right foot flexed to help protect your knee joint.
- Reach your hands through the space between your legs to grasp the back of your left thigh.
- Gently pull your left leg towards your chest until you feel a comfortable stretch in your right glute and hip.
- Hold the position, breathing deeply, before slowly releasing and switching to the other side.
Important Consideration: You should feel the stretch in the hip and buttock of the crossed leg. If you experience any pinching or sharp pain in your knee or hip joint, immediately reduce the intensity or release the stretch. Incorrectly flexing the foot or pulling too aggressively can place unwanted stress on the knee.
Tips for a Better Stretch
- Keep Your Head Down: Ensure your head and shoulders remain relaxed on the floor. If your head lifts, place a small pillow under it for support.
- Flex the Foot: Actively flex the foot of the leg being stretched (the one on top). This helps stabilise the knee joint and can deepen the sensation in the hip.
- Breathe and Hold: Maintain the stretch for 30-45 seconds on each side. Focus on deep, steady breathing to help your muscles release tension. Avoid bouncing or forcing the movement.
- Modify as Needed: If reaching your thigh is difficult, you can loop a towel or strap around it to gently pull it closer. For a seated version, perform the same leg position while sitting tall in a chair.
5. Butterfly Stretch (Baddha Konasana)
The Butterfly Stretch, or Baddha Konasana in yoga, is a gentle seated stretch that targets the inner thighs, groin, and hip adductors. It is widely recognised for its ability to improve hip flexibility and external rotation. This stretch is a cornerstone for addressing hip discomfort because it encourages the hips to open in a controlled, passive manner, which can help release tension built up from prolonged sitting or certain physical activities.
This pose is commonly featured in a wide range of settings, from traditional yoga and martial arts training to physical education classes for children. Due to its gentle nature, it's also a staple in prenatal yoga programs, as it helps prepare the pelvic region for childbirth. For more information on managing discomfort during this time, you can learn more about how to relieve hip pain during pregnancy.
How to Perform the Butterfly Stretch
- Sit on the floor with your legs extended in front of you.
- Bend your knees and bring the soles of your feet together, allowing your knees to fall out to the sides.
- Pull your heels as close to your pelvis as is comfortable.
- Hold onto your feet or ankles with your hands, keeping your spine straight and your shoulders relaxed.
- To deepen the stretch, you can gently fold forward from your hips, maintaining a long spine.
Important Consideration: Avoid forcing your knees to the floor, as this can strain the inner thighs or knee joints. The stretch should be felt in the groin and inner thighs, not as pain in the knees. Pushing too hard can risk injury to the knee ligaments or adductor muscles.
Tips for a Better Stretch
- Elevate Your Hips: Sitting on a folded blanket or a firm cushion can tilt your pelvis forward, making it easier to maintain a straight spine and deepen the stretch.
- Use Gentle Pressure: If comfortable, you can gently press your knees towards the floor with your hands or elbows, but only to the point of a mild stretching sensation.
- Breathe and Hold: Focus on deep, steady breathing to help your muscles relax. Hold the stretch for 30 seconds to 2 minutes, depending on your comfort level.
This pose is particularly useful for those who experience tightness in the inner thigh and groin, which can be a contributing factor to hip pain.
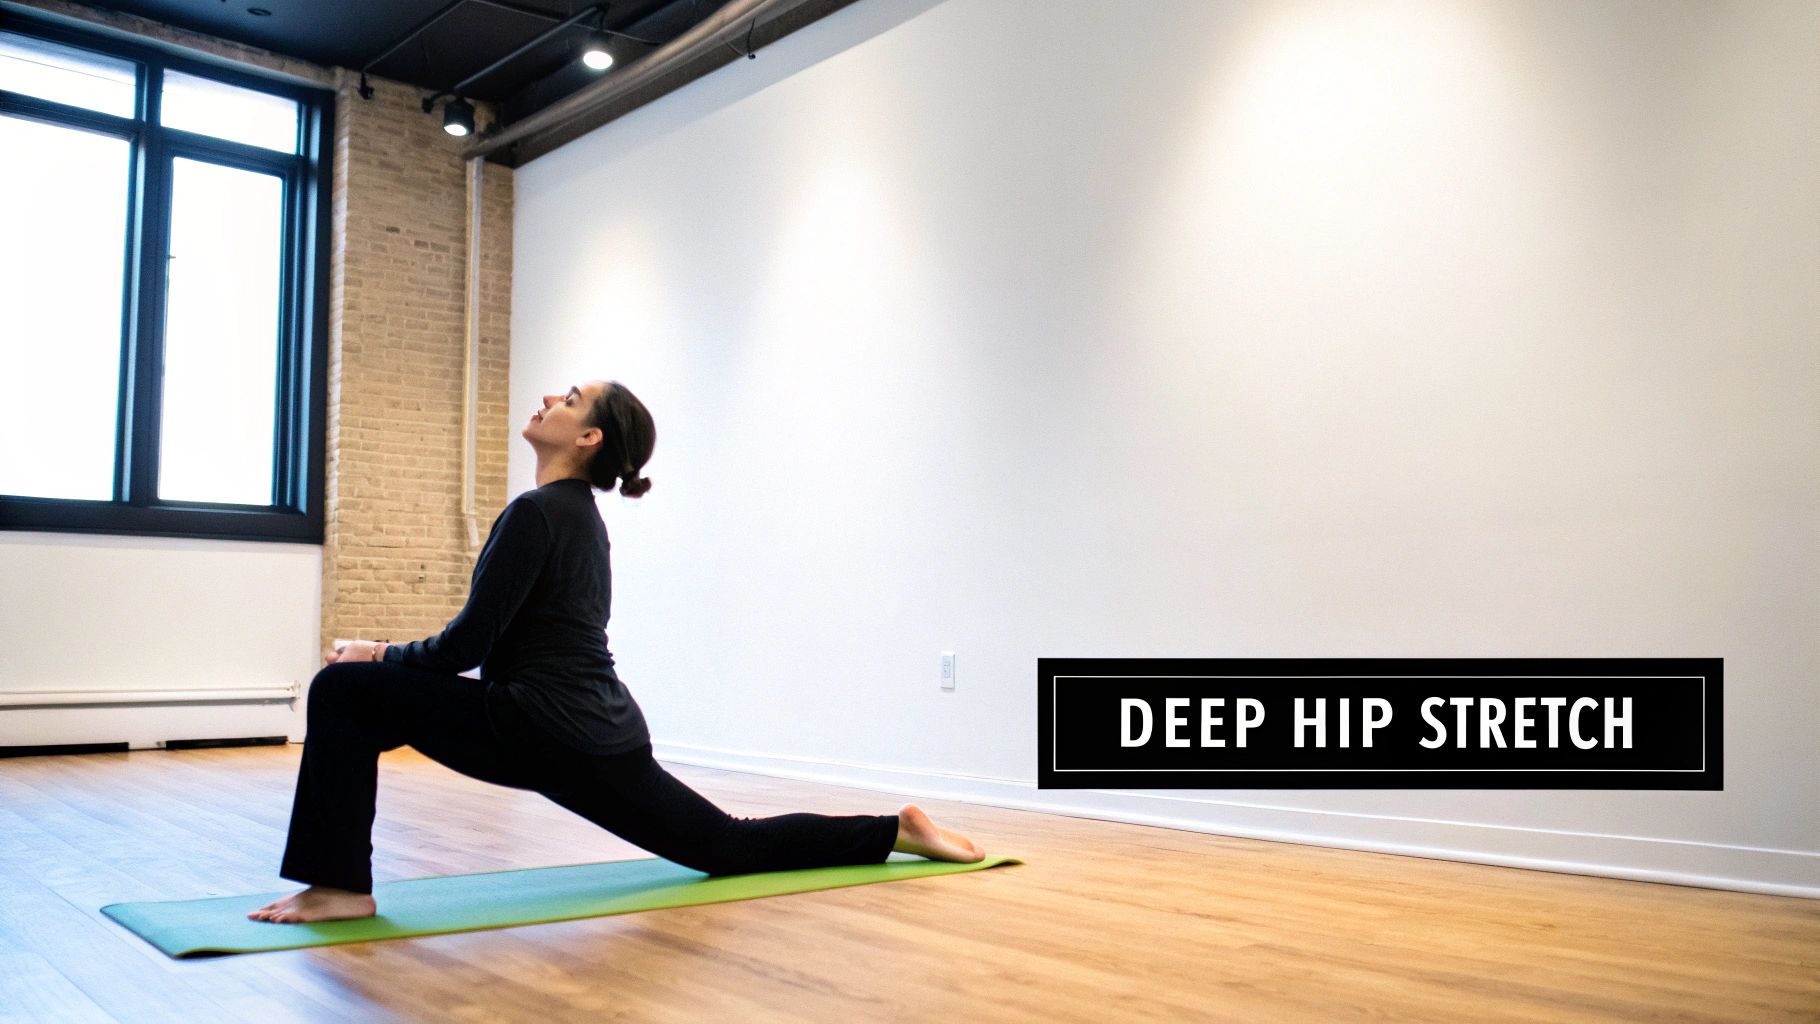
6. Lizard Pose (Utthan Pristhasana)
Lizard Pose is a deep hip opener that targets the hip flexors, groin, hamstrings, and quadriceps. It combines elements of a lunge with a wide-legged position, offering an intense stretch that can be modified to suit various levels of flexibility. This pose is particularly beneficial as one of the key stretches for hip pain because it allows for a prolonged, deep release of tension held in the inner and front hip areas.

Stemming from the Ashtanga yoga tradition, Lizard Pose has been widely adopted by power yoga instructors and mobility coaches. It is frequently incorporated into athletic training programs and flexibility workshops to help improve hip mobility and address tightness that can arise from activities like running or sitting for long periods. Chiropractors also suggest various stretches that can complement a workout routine and improve performance, which you can learn more about on mychiro.com.au.
How to Perform the Lizard Pose
- Start from a low lunge position with your right foot forward and your back (left) knee on the floor.
- Walk your right foot out to the right edge of your mat, so both of your hands are inside your right foot.
- Keep your hands planted on the floor, directly under your shoulders.
- Ensure your front knee stays aligned directly over your ankle, not splaying out to the side.
- To deepen the stretch, you can lower down onto your forearms. If your back knee is sensitive, place a folded blanket underneath it for cushioning.
Important Consideration: This is a deep stretch. Never force your body into a position that causes sharp or shooting pain. Listen to your body's signals and modify as needed. Pushing too deeply too soon risks muscle or joint strain.
Tips for a Better Stretch
- Use Support: If you cannot comfortably lower to your forearms, place your hands or forearms on yoga blocks. This brings the floor closer to you and makes the pose more accessible.
- Breathe Deeply: Focus on steady, deep breaths. With each exhalation, try to consciously release tension in your hips.
- Maintain Alignment: Keep your hips square to the front of your mat and actively press the hip of the back leg down and forward to intensify the stretch in the hip flexor.
- Hold and Switch: Hold the pose for 30-60 seconds, breathing consistently, before carefully pushing back up to your hands and switching to the other side.
7. Happy Baby Pose (Ananda Balasana)
Happy Baby Pose is a gentle, restorative stretch performed while lying on your back. It is known for its ability to release tension in the hips, inner thighs (adductors), and lower back. By drawing the knees towards the armpits, this pose mimics a baby's natural, relaxed state, creating a passive stretch that can help alleviate discomfort associated with tight hips and groin muscles. This position is particularly beneficial as one of the stretches for hip pain because it allows gravity to assist in opening the hips without putting strain on the knees or lower back.
Popularised by restorative and Yin yoga teachers, Happy Baby Pose is included in routines designed for relaxation and recovery. It is frequently incorporated into physical therapy programs to improve hip mobility and is often recommended as a cool-down stretch after exercise to gently lengthen the muscles around the pelvis and lower spine.
How to Perform the Happy Baby Pose
- Lie on your back on a mat or comfortable surface.
- Bend your knees into your chest.
- Grasp the outsides of your feet with your hands. Open your knees slightly wider than your torso, bringing them towards your armpits.
- Ensure your ankles are directly over your knees, so your shins are perpendicular to the floor.
- Gently flex your heels and push your feet up into your hands as you use your hands to pull down, creating a gentle resistance.
Important Consideration: Keep your head and the full length of your spine, including your tailbone, pressed into the floor to maintain proper alignment and protect your lower back. If you find your lower back lifting significantly, ease off the stretch, as this can cause spinal strain.
Tips for a Better Stretch
- Modify Your Grip: If reaching your feet is difficult, hold onto your ankles or the backs of your thighs instead. This modification makes the pose more accessible.
- Add Gentle Movement: A slow, gentle rock from side to side can provide a massage-like effect on the lower back and deepen the release in each hip.
- Breathe and Hold: Focus on deep, diaphragmatic breathing. Hold the pose for at least 30 seconds and up to 1-2 minutes to allow your muscles adequate time to relax and lengthen.
- Keep Your Neck Relaxed: Make sure your head and neck remain relaxed on the floor. If your head lifts, place a thin blanket or cushion under it for support.
This pose should create a pleasant stretching sensation in the inner groin, hips, and lower back.
7 Key Hip Stretch Comparison
| Stretch / Pose | Implementation Complexity 🔄 | Resource Requirements ⚡ | Potential Outcomes 📊 | Ideal Use Cases 💡 | Key Advantages ⭐ |
|---|---|---|---|---|---|
| Pigeon Pose (Eka Pada Rajakapotasana) | Moderate 🔄🔄 | None (mat recommended) ⚡ | Deep hip flexor & piriformis stretch, improves mobility 📊 | Athletes, physical therapy, yoga sessions 💡 | Targets tight hips, may improve posture ⭐ |
| 90/90 Hip Stretch | Moderate 🔄🔄 | None (floor space) ⚡ | Addresses hip rotation imbalances, mobility gains 📊 | Mobility assessments, athletes, CrossFit 💡 | Can be used as a bilateral stretch, identifies imbalances ⭐ |
| Hip Flexor Stretch (Couch Stretch) | High 🔄🔄🔄 | Elevated surface (couch) ⚡ | Intense hip flexor release, may correct anterior pelvic tilt 📊 | Office workers, rehab, athletic training 💡 | Useful for hip flexors, posture correction ⭐ |
| Figure-4 Hip Stretch | Low 🔄 | None ⚡ | Stretches piriformis & external rotators 📊 | Runners, office wellness, seniors 💡 | Gentle, versatile, may help with sciatic-like symptoms ⭐ |
| Butterfly Stretch (Baddha Konasana) | Low 🔄 | None ⚡ | Hip adductor & groin stretch, improves flexibility 📊 | Prenatal yoga, martial arts, kids 💡 | Gentle and accessible for most, promotes joint mobility ⭐ |
| Lizard Pose (Utthan Pristhasana) | Moderate to High 🔄🔄🔄 | None (mat recommended) ⚡ | Deep hip opening, improves multi-plane mobility 📊 | Advanced yoga, athletic training, flexibility 💡 | Adaptable intensity ⭐ |
| Happy Baby Pose (Ananda Balasana) | Low 🔄 | None ⚡ | Gentle hip, lower back, and inner thigh stretch 📊 | Restorative yoga, rehab, relaxation 💡 | Safe for many, good for beginners and back issues ⭐ |
Integrating Stretches into Your Routine Safely
You now have a curated collection of seven stretches designed to address the tightness and discomfort that often contribute to hip pain. From the deep release of the Pigeon Pose and 90/90 Stretch to the gentle opening of the Butterfly and Happy Baby Poses, each movement offers a unique way to target the complex network of muscles surrounding your hip joints. The key takeaway is that consistent, mindful practice is more beneficial than occasional, aggressive stretching.
The goal is to foster mobility and ease muscular tension, not to force your body into uncomfortable positions. As you begin incorporating these movements into your daily life, remember the importance of listening to your body. A gentle pulling sensation indicates a productive stretch, whereas sharp, shooting, or sudden pain is a signal to stop immediately. Progress should be gradual, built on a foundation of consistency and respect for your body’s current limitations.
Building a Sustainable Stretching Habit
Creating a lasting routine involves more than just performing the exercises. Progress comes from integrating these practices into your lifestyle in a way that feels supportive and sustainable.
- Consistency Over Intensity: Aim for shorter, more frequent stretching sessions. Dedicating 10-15 minutes each day to a few of these hip stretches may yield better results than one long, intense session per week. This approach helps maintain flexibility and prevents the muscles from tightening up again.
- Warm-Up First: Never stretch cold muscles. Engage in 5-10 minutes of light cardio, such as walking, jogging on the spot, or dynamic movements like leg swings, before you begin static stretching. This increases blood flow to the muscles, making them more pliable and reducing the risk of injury.
- Mindful Breathing: Focus on your breath during each stretch. Inhale as you prepare and exhale as you deepen the stretch. Deep, controlled breathing helps relax the nervous system and allows your muscles to release more effectively.
- Manage Post-Workout Discomfort: As you become more active, you might experience general muscle tenderness. As you integrate these stretches, it's also helpful to consider broader strategies for reducing muscle soreness after workouts to support a comfortable and sustainable routine.
When to Seek Professional Guidance
While these stretches for hip pain can be a useful tool for managing muscular tightness, it is crucial to recognise their limitations. Stretching is one component of musculoskeletal health, but it may not address the underlying cause of persistent or severe hip pain.
Important Note: Self-management strategies are not a substitute for a professional diagnosis. If your hip pain is chronic, worsens over time, or is the result of an injury, seeking an assessment from a qualified healthcare provider is a sensible step.
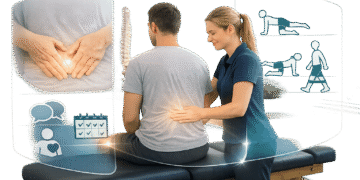
Conditions affecting the hip can be complex, involving joints, ligaments, nerves, or alignment issues that require a specific diagnosis and a structured care plan. A healthcare professional, such as a chiropractor or physiotherapist, can perform a thorough assessment to identify the root cause of your discomfort. They can then provide a personalised plan that may include manual therapy, targeted exercises, and lifestyle advice tailored to your specific condition, ensuring you are on an appropriate path for your health.
If your hip pain persists, it may be time for a professional assessment. The team at MyChiro in Bondi Junction uses detailed evaluations to understand the underlying source of discomfort and develops structured care plans. Book an appointment to get a clear understanding of your hip health and receive guidance.