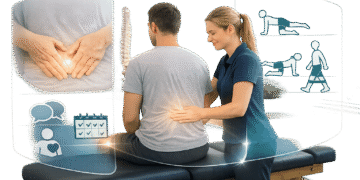


A neck hump – known medically as a dowager’s or buffalo hump – can feel like more than just a physical ailment. It’s a visible reminder of poor posture, prolonged stress, and the toll that modern lifestyles can take on our bodies. For those juggling long hours at a desk, lifting kids, or even maintaining an active lifestyle, the development of a neck hump can be frustrating and impact both confidence and comfort.
In this article, we’ll explore actionable and evidence-based tips to target and correct a neck hump. Using techniques outlined in an expert video by Dr Rowe from SpineCare, we’ll break down the exercises that can stretch tight muscles, strengthen weak areas, and restore balance to your posture. Whether you’re dealing with chronic neck pain, battling "tech-neck", or simply looking to feel more aligned and energised, these exercises can make a transformative difference.
What Causes a Neck Hump?
Before diving into solutions, it’s essential to understand the key drivers of a neck hump. As explained by Dr Rowe, this condition is often caused by a combination of:
- Poor posture: Prolonged leaning forward (such as while working at a computer) creates tension in the upper back and neck.
- Tight chest muscles: Over time, tightness in the pectoral muscles draws the shoulders forward, contributing to a rounded upper back.
- Weak upper back muscles: Insufficient strength in the upper back and neck fails to counteract poor postural habits, allowing the neck hump to form.
- Forward head posture: The head being misaligned in front of the body further exacerbates this condition.
Thankfully, the solution lies in a combination of targeted stretches and strengthening exercises that address both tight and weak muscles.
Step-by-Step Guide to Fixing a Neck Hump
Dr Rowe’s approach focuses on two key strategies: lengthening (stretching tight muscles) and strengthening (activating weak muscles). By combining these steps, you can retrain your body to maintain proper posture and reduce the appearance of a neck hump.
1. Releasing Tight Chest Muscles
Tight chest muscles are a common culprit behind rounded shoulders and forward posture. Stretching these muscles is the first step to restoring alignment.
The Corner Wall Stretch:
- Find a corner of a wall and stand close to it.
- Raise your arms to a "Y" position, with your palms resting on the wall.
- Lean your body weight forward, pressing your chest towards the corner. You’ll feel a stretch across the chest and between your shoulder blades.
- Hold for 20–30 seconds while breathing deeply.
- Repeat this process in three positions:
- Y-position (arms up and wide).
- Field goal position (elbows bent at 90 degrees).
- W-position (elbows tucked closer to the sides).
- Focus on whichever position targets your tightness most effectively, and repeat on both sides if one feels tighter than the other.
2. Stretching Tight Upper Back and Neck Muscles
Tight upper back muscles, such as the trapezius and levator scapulae, contribute significantly to forward head posture and neck humps.
Upper Trapezius Stretch:
- Take one arm and slide it across your lower back.
- Use your opposite hand to gently pull your head sideways, bringing your ear towards the opposite shoulder.
- Deepen the stretch by tilting your chin upward towards the ceiling.
- Hold for 15–20 seconds and repeat two to three times on each side.
Levator Scapulae Stretch (aka "Armpit Sniffer"):
- Turn your head towards one shoulder at a 45-degree angle.
- Place the opposite hand on the back of your head and gently pull your chin downward towards your armpit.
- Hold for 15–20 seconds and repeat two to three times on each side.
Sternocleidomastoid (SCM) Stretch:
- Turn your head towards one shoulder and gently tilt your head back as if letting it "fall off the cliff" of your shoulder.
- You’ll feel the stretch from the base of your skull, through your neck, and into your collarbone.
- Hold for 15–20 seconds and repeat on both sides.
3. Strengthening Weak Upper Back Muscles
Strong and active upper back muscles provide the support needed for maintaining proper posture.
Wall Angels:
- Stand close to a wall, with your chest flush against it and your palms resting on the surface.
- Slide your hands upward as if making a snow angel, then slowly bring them back down.
- Add a challenge by lifting your hands slightly off the wall as you move.
- Repeat 5–10 times, building into the stretch with each repetition.
Field Goal Angels:
- Start with your arms at 90 degrees (field goal position) and press your elbows backward to pinch your shoulder blades.
- Slowly lift your arms upward, hold briefly, and return to the starting position.
- Perform 5–10 repetitions.
The Turtle Exercise:
- Stand or sit with your arms extended outward and palms facing forward.
- Press your hands backward to stretch the chest and activate the shoulder blades.
- Push your head forward in a "turtle" motion, then slowly tilt it upward.
- Add a final movement by pressing the back of your head downward towards your upper spine.
- Perform 5–10 repetitions.
4. Activating Rhomboid Muscles
The rhomboids, located between your shoulder blades, are essential for maintaining proper posture.
Shoulder Blade Pumps:
- Lie on your stomach (or at the edge of a bed) with your arms out to the sides and palms facing up.
- Tuck your chin towards your chest and slightly lift your head.
- Press your hands upwards towards the ceiling, engaging the muscles around your shoulder blades.
- Hold for 5 seconds and repeat 5–10 times.
T, Y, and Hitchhiker Variations:
- For the T-position, stretch your arms wide and point your thumbs upwards. Engage your shoulder blades as you lift your arms.
- For the Y-position, extend your arms diagonally upward into a "Y" shape and lift.
- Perform 5 repetitions in each position, focusing on whichever variation feels most effective.
Key Takeaways
- Stretch and strengthen: Address the root causes of a neck hump by stretching tight muscles (chest, trapezius, levator scapulae) and strengthening weak ones (lower trapezius, rhomboids, SCM).
- Progressive practice: Repetition is key – perform these exercises consistently to see gradual improvement.
- Target your weak link: Focus on whichever stretch or exercise addresses your tightest or weakest areas most effectively.
- Balance is critical: Repeat all stretches and strengthening exercises on both sides of the body to maintain muscular balance.
- Avoid overdoing it: Start slow and increase repetitions or sets only as your body allows.
Conclusion
The neck hump is more than just a postural issue – it’s a signal that your body needs realignment and care. Incorporating these targeted exercises into your routine can help restore posture, alleviate pain, and boost your confidence. By focusing on both tight and weak muscles, you’ll achieve long-term results without relying on quick fixes or invasive methods. Remember, consistency is your greatest ally in this journey. Start small, listen to your body, and enjoy the benefits of better posture and health.
Source: "The Neck Hump Muscle (How to FIX IT and Your Posture)" – SpineCare Decompression and Chiropractic Center, YouTube, Apr 7, 2025 – https://www.youtube.com/watch?v=VxdOrwGDnhk